Ansible安装并带您入门
Ansible安装并带您入门
一、简介
Puppet, SaltStack, Chef, Ansible都是服务器批量运维常用工具,其中Ansible最大的亮点在于"无客户端、简单易用和日志集中控管。",不用帮每台机器 (instance) 预载 agent,只要有 SSH 和 Python 就可以。,本文介绍一下Ansible的基本使用。
二、结构
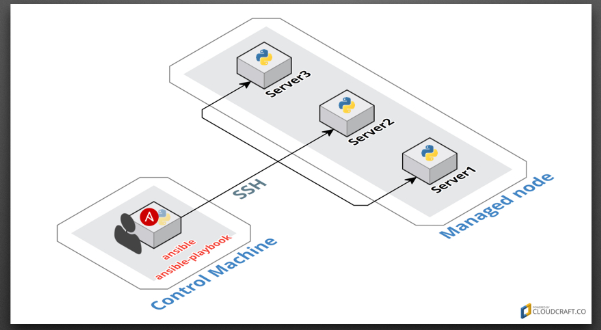
1、当 Control Machine (主控端) 可以用 SSH 连上 Managed node,且被连上的机器里有预载 Python 时,Ansible
就可以运作了!
2、Managed node 则是被 Ansible 操纵的机器。
三、在Control Machine中安装Ansible
Ubuntu (Apt)

    安装 add-apt-repository 必要套件。
    $ sudo apt-get install -y python-software-properties software-properties-common

    使用 Ansible 官方的 PPA 套件来源。
    $ sudo add-apt-repository -y ppa:ansible/ansible; sudo apt-get update

    安装 Ansible。
    $ sudo apt-get install -y ansible


CentOS (Yum)

    新增 epel-release 第三方套件来源。
    $ sudo yum install -y epel-release

    安装 Ansible。
    $ sudo yum install -y ansible


macOS (Homebrew)

    请先安装 homebrew,已安装者请略过。
    $ /usr/bin/ruby -e "$(curl -fsSL https://raw.githubusercontent.com/Homebrew/install/master/install)"

    安装 Ansible。
    $ brew install ansible

Python (Pip)
    Ansible 近来的释出速度很快,若想追求较新的版本可改用 Pip 的方式进行安装,较不建议初学者使用。
    需请先安装 pip,已安装者请略过。
    # Debian, Ubuntu
    $ sudo apt-get install -y python-pip


    # CentOS
    $ sudo yum install -y python-pip

    # macOS
    $ sudo easy_install pip

    升级 pip。
    $ sudo pip install -U pip

    安装 Ansible。
    $ sudo pip install ansible
四、在Managed node 中安装Python和SSH(一盘系统都自带了,因此可忽略此步骤)
Ubuntu.
$ sudo apt-get install -y openssh-server python2.7

CentOS.
$ sudo yum install -y openssh-server python
五、修改配置
1、安装好Ansible后,我们可以在/etc/ansible目录下看到配置文件。修改:ansible.cfg,例如:
inventory = hosts
remote_user = root
host_key_checking=False
2、修改/etc/ansible/hosts文件,参考下图,可以使用如下变量:ansible_ssh_host、ansible_ssh_port、ansible_ssh_user、ansible_ssh_pass、ansible_ssh_private_key_file。
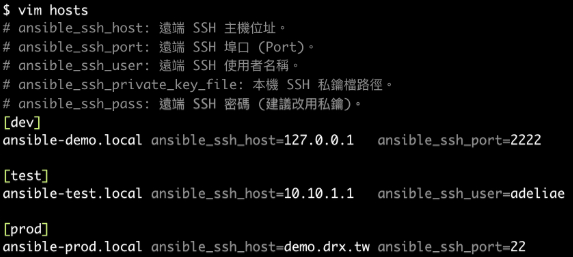
例如我测试使用的配置:

六、测试执行命令
如:执行:
$ ansible localhost -m command -a 'echo Hello World.'
localhost | SUCCESS | rc=0 >>
Hello World.

七、测试playbook
1、在/etc/ansible目录下,执行:vim ./helloworld.yml 内容如下:
---

- name: say 'hello world'
  hosts: huawei
  tasks:

    - name: echo 'hello world'
      command: echo 'hello world'
      register: result

    - name: print stdout
      debug: var=result
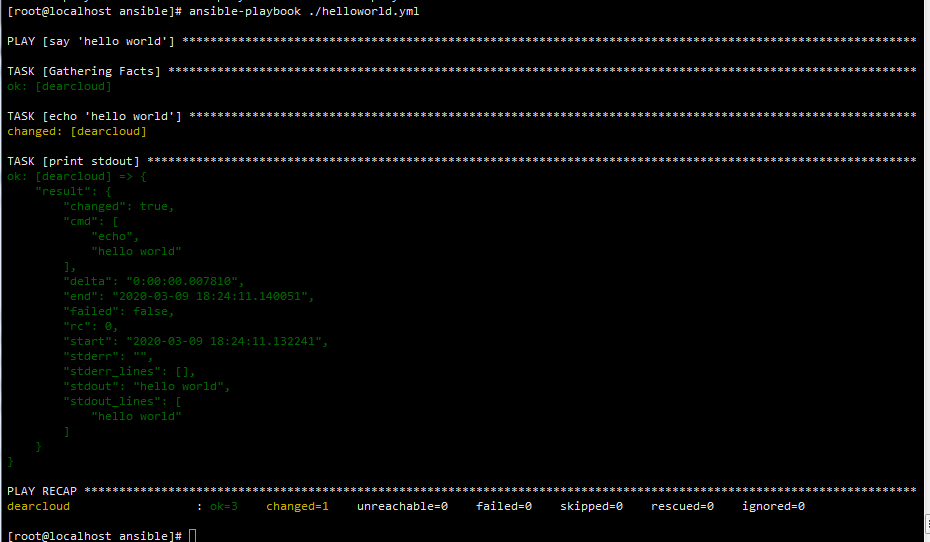
2、执行:ansible-playbook ./helloworld.yml
八、模板测试
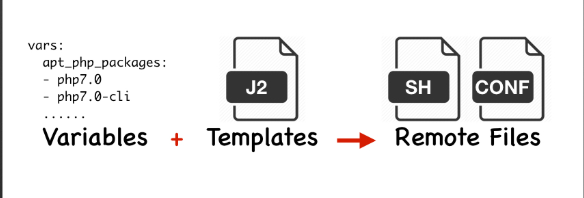
1、新建template文件,vi helloworld2.txt.j2,内容如下:
Hello "{{ dynamic_world }}"
2、新建playbook文件,vi helloworld2.yml,内容如下:
---
- name: Play the template module
  hosts: all
  vars:
    dynamic_world: "World"

  tasks:
    - name: generation the hello_world.txt file
      template:
        src: helloworld2.txt.j2
        dest: /tmp/hello_world.txt

    - name: show file context
      command: cat /tmp/hello_world.txt
      register: result

    - name: print stdout
      debug:
        msg:
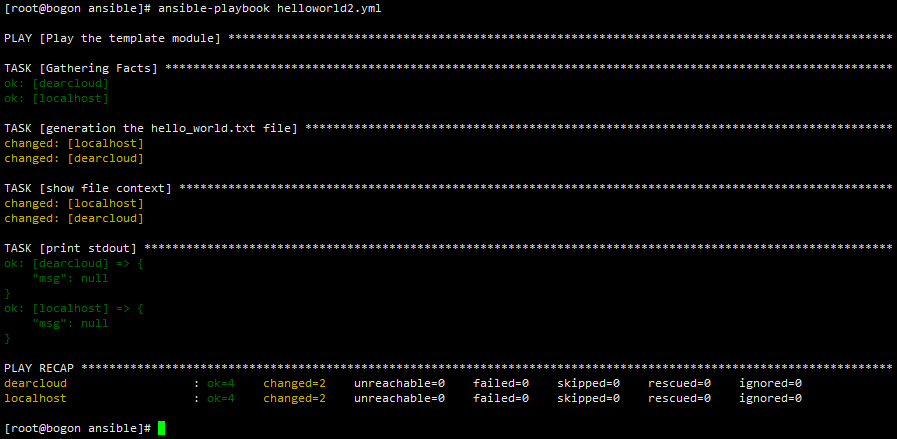
3、执行playbook:
ansible-playbook helloworld2.yml
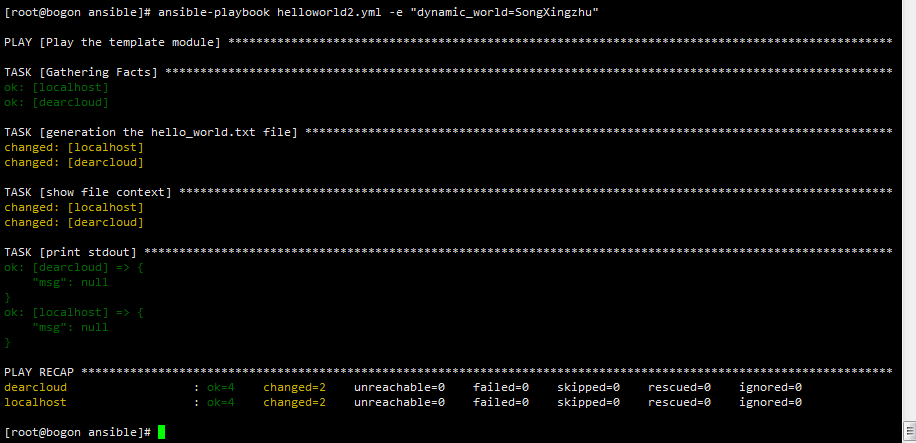
4、指定环境变量
ansible-playbook helloworld2.yml -e "dynamic_world=SongXingzhu"
Ansible安装并带您入门
https://www.dearcloud.cn/2020/03/09/20200310-cnblogs-old-posts/20200309-Ansible安装并带您入门/